I upgraded to the AMD Ryzen 5800X and the MSI MAG Mortar Motherboard. It seemed easiest to upgrade my case at the same time. I chose the Cooler Master Master box Q300L. Installing the new motherboard in a new case would save me from uninstalling all the old stuff first. I also wanted to pass off my old PC parts to my wife and by keeping it in the original case it is easier.
What I Needed in a New Case
The great thing about the state of cases today is they are standard and most gamers don’t need a huge case. I didn’t need any crazy space for water cooling or a ton of RGB crazines.
What I did want:
- Dust filters for fan intakes.
- Easy Install.
- USB Ports on the front.
- Good thermal performance.
- Enough room for my massive Nvidia Geforce RTX 3090.
- It didn’t need to be a work of art, but I wanted something that looks decent.
- Not super expensive.
Why I Chose the Cooler Master Master Box Q300L

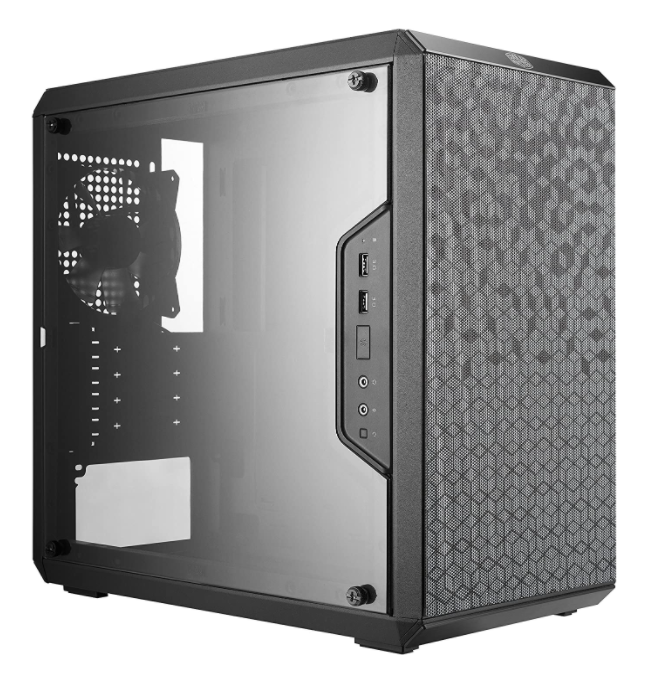
I searched so many different cases. Finally, I settled on a case that seemed to hit the sweet spot, the Cooler Master MasterBox Q300L. It checked the boxes on my list and in some ways, much more.
- Removable and magnetic dust filters.
- Easy access to install components and rubber feet on the side for installation.
- 2 USB 3.0 ports on the front with microphone and audio ports.
- Coolermaster level cooling design with perforated top, bottom, front and back.
- Room for any video card.
- Black and gray pattern on the filters.
- Transparent side panel with hand screws for easy access.
- It cost me less than $50.
- The USB port and PSU frame could be moved around all sides of the case.
All those boxes checked for the price I paid for Cooler Master Q300L was all the convincing I needed.
How the Case Install Went


Installing a motherboard is never easy, but some cases make it easier. For the Cooler Master Box, the side panel has rubber feet to make it easy to sit it on it’s side for installation. The hand turned screws came off easily to open the panel for installation.
The motherboard mounting screws were a pain until I realized there was a tool included. I put the tool on top of the screw, then use a Philip’s head screwdriver to easily turn them tight. Beyond that, it was easy enough to install the motherboard. As you noticed from the picture above, I don’t spend much time on cable management. I just want to play.
This case has a great dust filter/screen at the bottom. It gave me the confidence to mount my PSU with it’s intake facing down to pull in cooler air. There was also a spot for a case fan on the bottom, in front of the PSU. I’ll probably use that later.
I thought about moving the front of the case USB panel to the top, but didn’t want to reroute the wires. It’s an option, but not super easy to move. Besides rerouting the wires, there’s 4 screws to remove and reinstall if you want to move the USB panel.
Cooler Master Q300l a Bit of a Tight Fit
My massive video card fit into the Cooler Master Q300L case, but there was not much room between its fans and the PSU. I’m sure I’ll need to utilize that bottom fan mount to feed cool air directly to the GPU eventually. My new AMD Ryzen CPU unleashed the full potential of my Nvidia 3090, so now it gets hot enough to run the fans on high. It sounds like a small jet taking off.
The case was smaller than I imagined. It’s amazing all my parts fit, but I’ll have to add those additional case fans due to the tight squeeze for the video card. It’s a great case for anyone that wants something that works and is not looking for something super flashy. Just don’t forget extra case fans like I did.
Thanks for your blog, nice to read. Do not stop.